
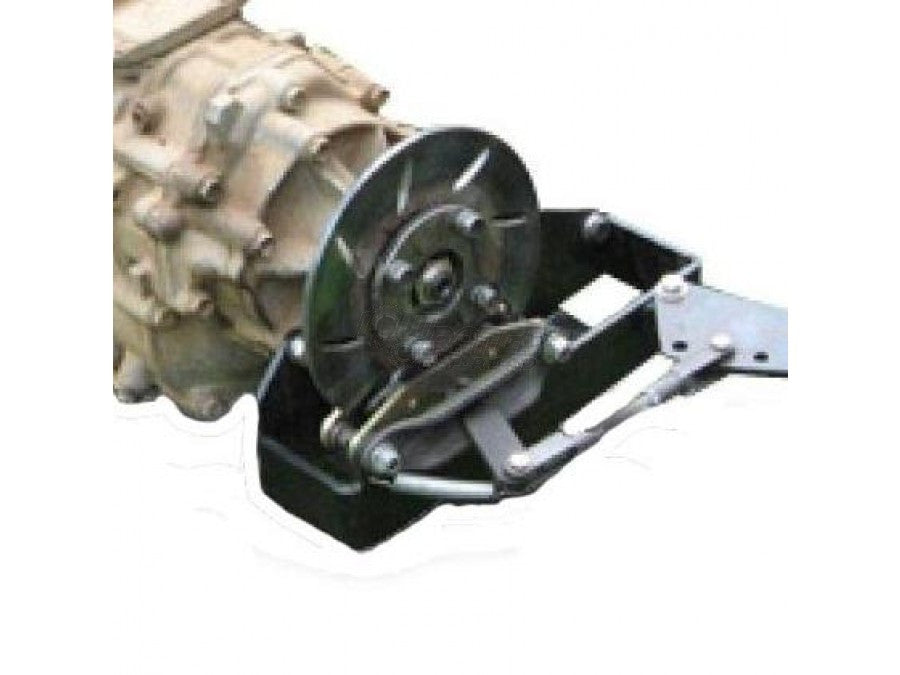
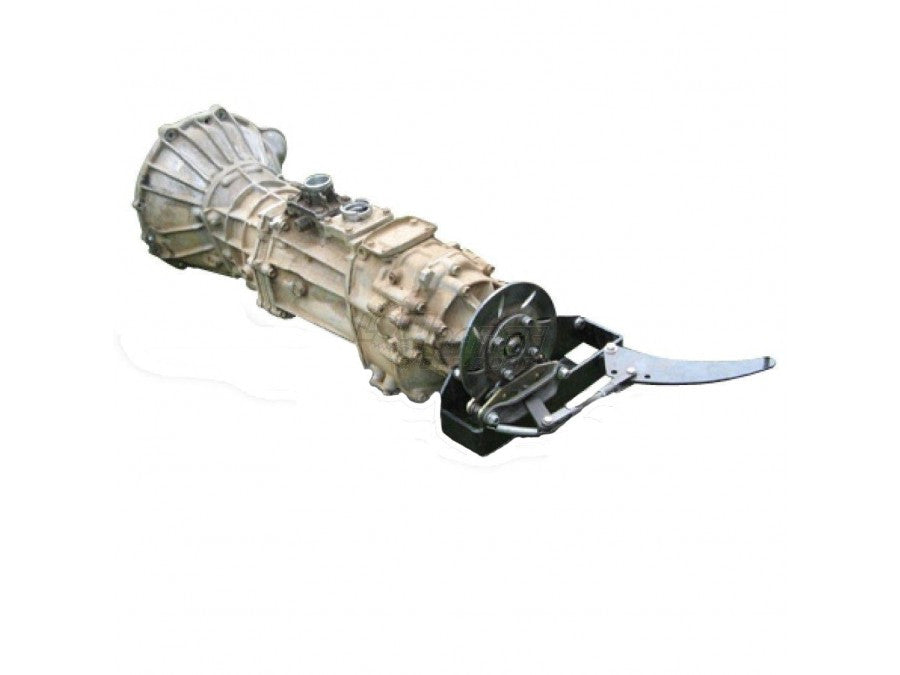
Need an E-brake? Have bad cables, or a disk brake conversion? We have the answer with our simple and affordable Toyota T-case E-Brake Kit. It can be installed in under 1 hour and is fully bolt on. You do have to remove the t-case output flange in order to clearance the dust seal cover.
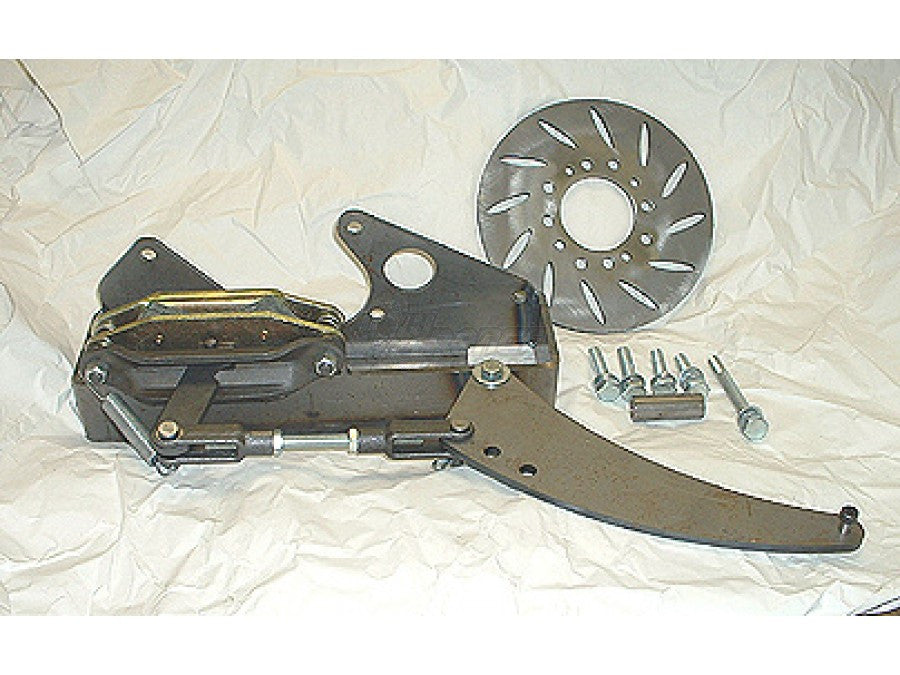
The E-brake kit reuses your stock e-brake cable up to the frame mounted e-brake arm located in front of your fuel tank. The t-case e-brake is constructed of laser cut and tig welded CNC formed 1/4 plate steel. Includes all parts you will need for installation, comes with instructions.
Fits all 4 cyl. Manual Toyota t-case's. Bracket’s are designed with a skid plate below the caliper and the ends are formed and tig welded to the main plate. The box style mount helps ensure no flexing of the t-case and caliper mount. This helps eliminate wear on the pads as well as possible stress on the t case itself. May not fit with all aftermarket t-case crossmembers.
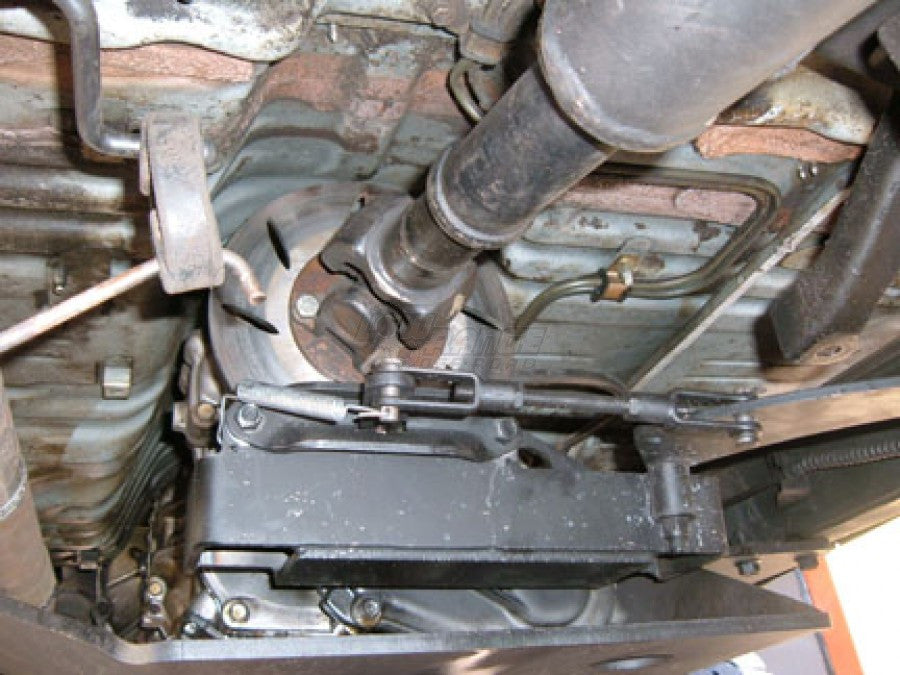
Please note: 79-83 will require swapping to large 10mm bolt pattern flanges. Due to many variations in Skid plates, transfer case combination,motor and trans mounts, fuel lines closest to rotor of t case e-brake may need to be relocated to clear. This is very common on 4 runners where the body is lower for rear passenger foot well. Depending on how much t case skid plate lifts the transfer case, trimming and boxing of floorboard may be required.
Instructions:
Installation of the t case e-brake requires you remove the t case output flange and remove the dust cover to fit rotor to back side of flange.
After removing flange and dust cover install rotor to back side of flange. We use the stock drive shaft bolts to position the rotor, the rotor is tapped for 2 patterns, determine the correct pattern for your drive shaft.
Next remove 4 bolts on the back transfer case cover, these are the bottom 2 and 2 above them. There is also a 5th bolt to remove on the far outside edge of the case, use the caliper mount to determine which one if unsure. This bolt will use the included spacer. Install t case flange with rotor, then slide caliper mount and caliper up to the rotor and install new longer bolts, flat washers and lock washer. Install jam nuts to all thread, then install yoke ends to all thread. Install arm to caliper mount, position of the arm will need to be determined by the installer as to which direction the arm will point and which holes to use. You may flip the arm and use the 3 adjustable yoke holes or use the standard single hole to install on the mount. Install 2.5 x 3/8ths bolt, flat washers and locknut. It is not necessary to tighten the lock nut completely, the arm should move freely but not be loose. Install the adjustable yoke ends with all thread and jam nuts. One end will use the spring to hold the pin, the other side will use the cotter pin. The shoulder bolt will fit through the stock e brake cable eye on the end of the e-brake arm. Note: 79-83 style cable will require a loop installed with wire crimp. Final adjustment may be needed and is the responsibility of the final installer.